More creatures

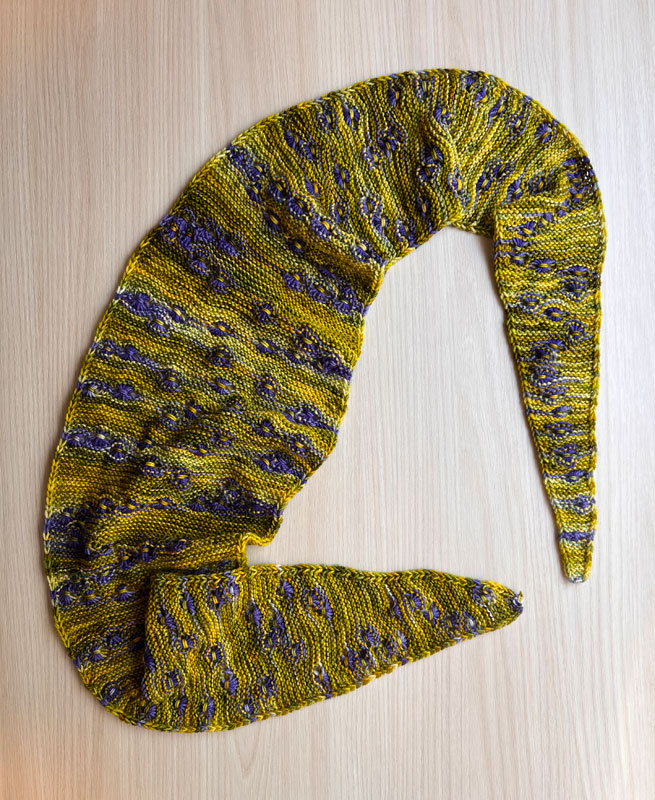
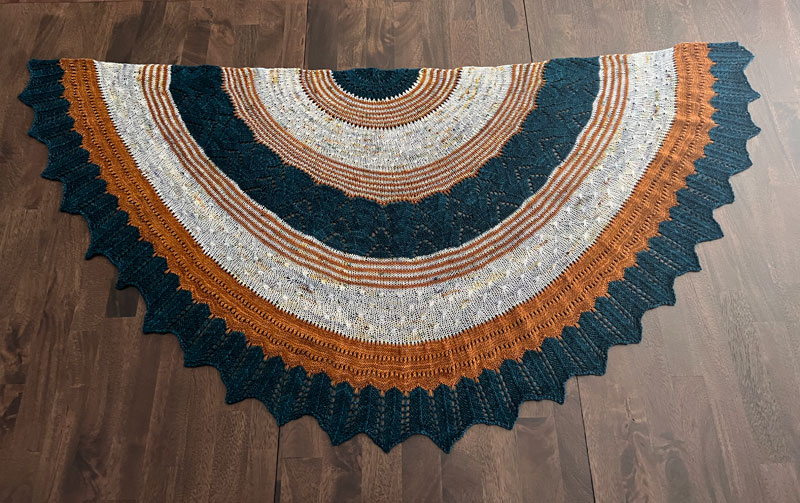
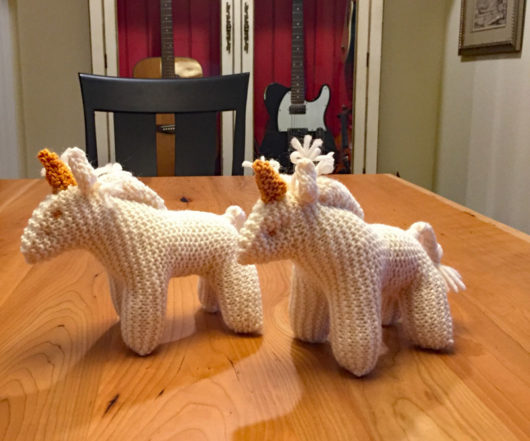
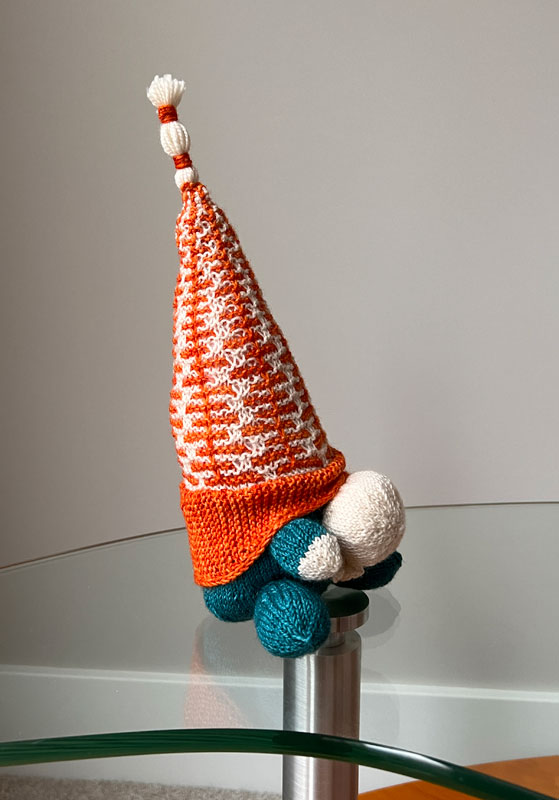
Seen here in profile, I call this creature my Ginormous Gnose Gnome. Designer Sarah Schira calls it The More You Gnome. And there is no one in the knitting universe these days who gnows gnomes as much as Schira does. She has 25 gnome and gnome-themed patterns in her Ravelry store. Go big or go gnome I guess. Gnome pun intended.

The very feature I loved the best, that gnifty big gnose, looked a tad odd to me face-forward when I completed the knit. I decided I gneeded to make a major modification. So I (tried) to give gnome some whiskers.

At first I knit the layer of strands just under his gnose. I showed him to a few people. Steve’s comment just about summed it up. “Why did you decide to give him gnose hairs?” “Oh gno, gnot what I intended.” Back to my gneedles. I knit a longer set of strands beneath the gnose hairs and my gnome passed inspection. “Yes, now I see a beard.”

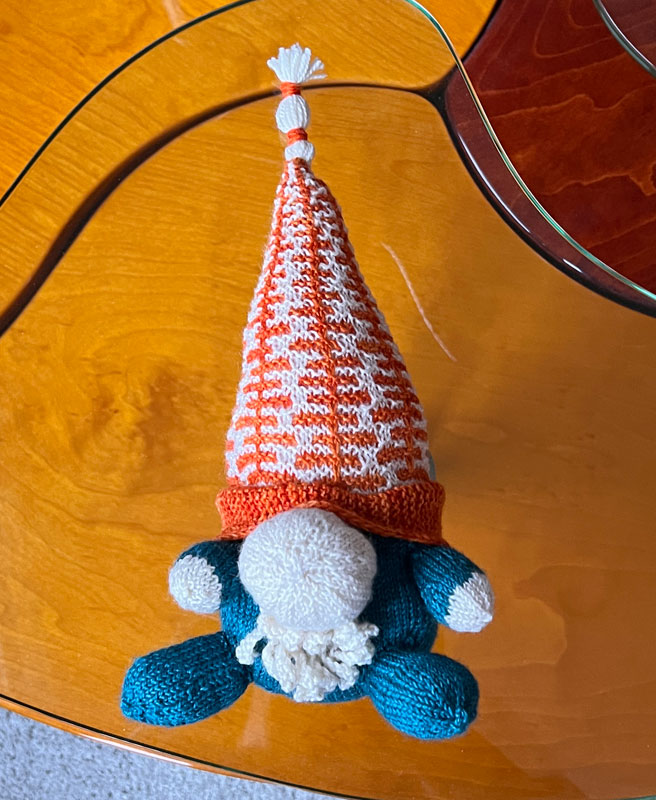
If you’re looking to reproduce my gnome’s beard, which unfortunately I fear makes my gnome look a bit like he’s sniffing a jellyfish, here’s what I did. I used a size 1 (US) needle and cast on 4 stitches and knit one row. For the gnose-hair section, I cast on 6 stitches at the start of the next row. I used the cable caston, which is a knit-on caston. On the next row I bound off the 6 stitches I’d just cast on and completed the row (4 more stitches). Next, turn and knit the 4 stitches. Cast on 6 more stitches and do the same bind-off “thing.” I repeated this process, casting on 8, casting on 8 again, casting on 6, and casting on 6 again. On the last row I bound off all 10 stitches. Finally, I sewed the piece just under the bulbous gnose.

To complete the whiskers, I repeated the above process and knit a second piece by casting on 8, then 8, then 8, 10, 10, and finally 8, 8, 8. I handled the sequential bindoffs the same as in the first piece. I sewed the second bunch of whiskers under the gnose hair section.

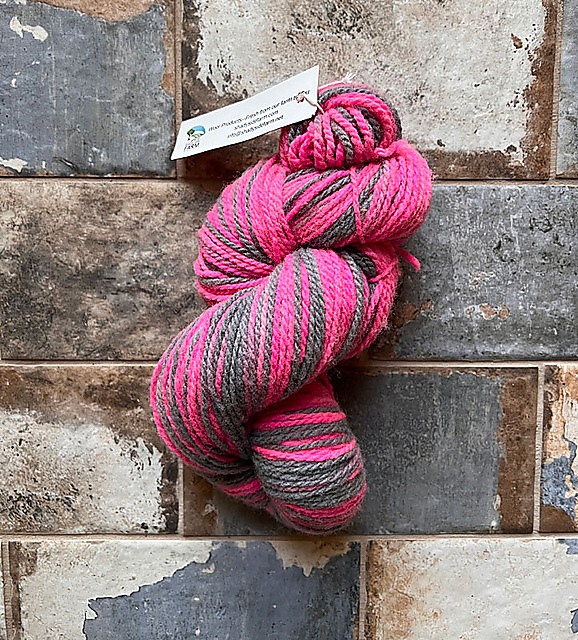
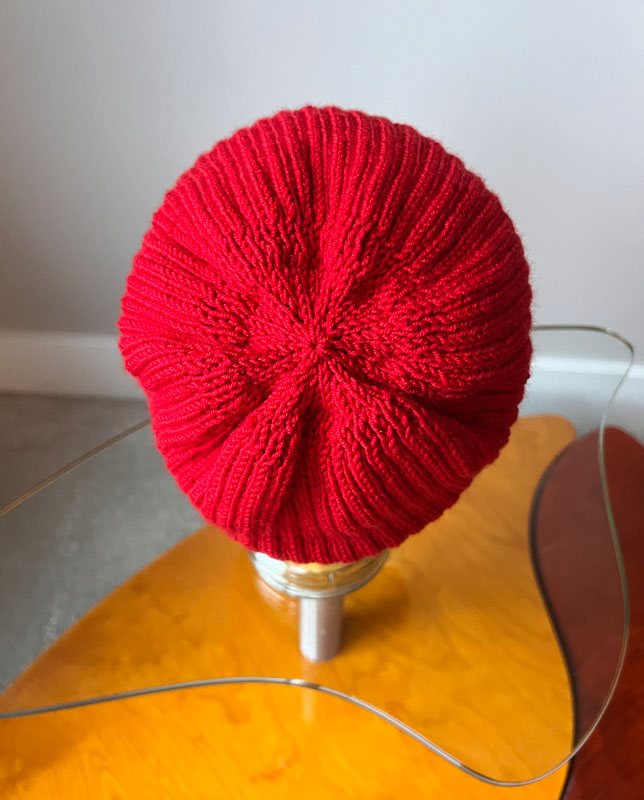
I was so taken with the designer’s gnome that I used exactly the recommended yarn in exactly the recommended colorways: Emma’s Yarns Practically Perfect Smalls (a fingering weight) in Whisper, Volume, and Tealicious. A fun knit. Great yarn!

Now, something more familiar–to me and to anyone who regularly reads my blog.

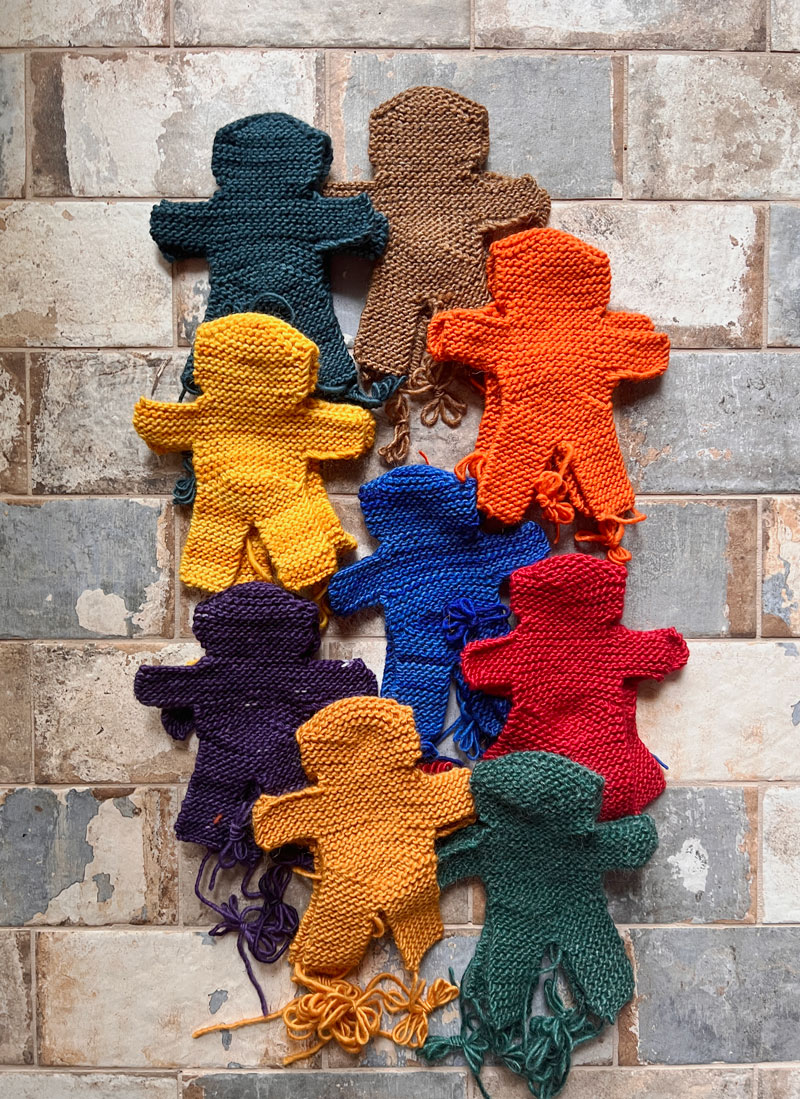
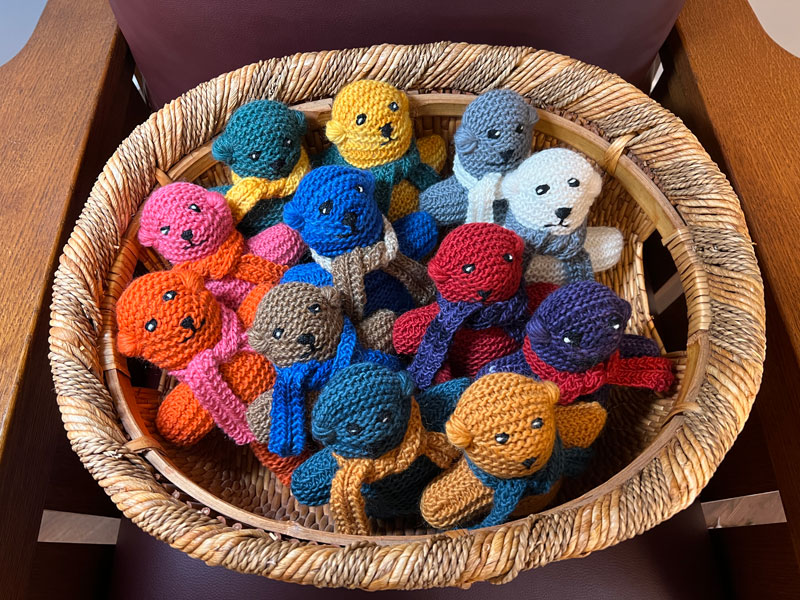
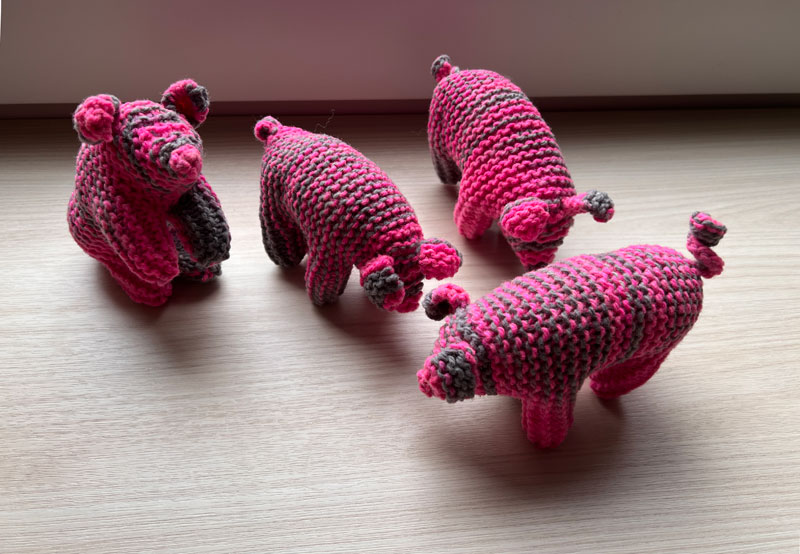
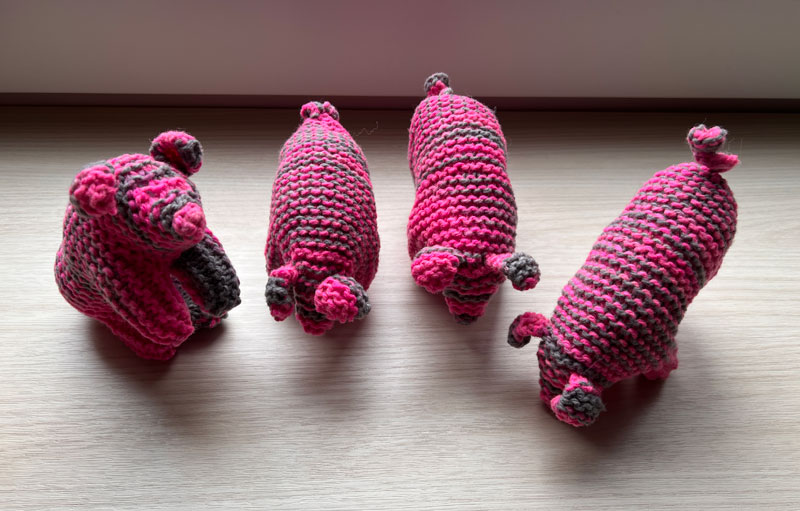
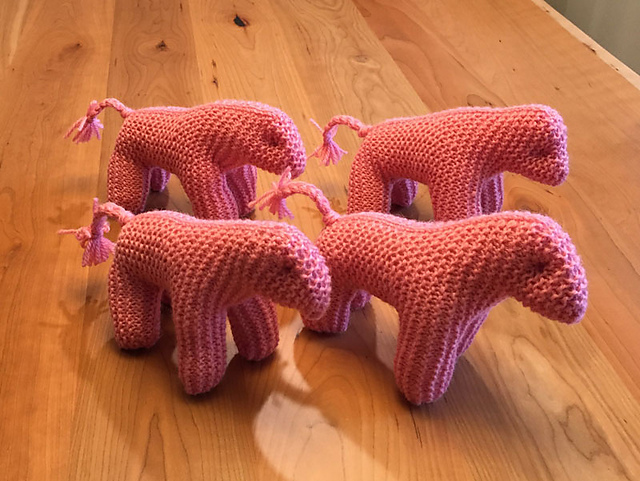
Not so long ago I had weeks and weeks when my brains were frazzled by fretting. If you think back to the last time you moved house methinks you can appreciate that. My mind and my fingers wanted an easy repetitious knit. My Sunrise Side Bear pattern is as familiar to me as my 15-year old Land’s End T-Shirts. My hands just started knitting these guys and I didn’t stop until my stash of Brown Sheep Lamb’s Pride worsted was almost exhausted.

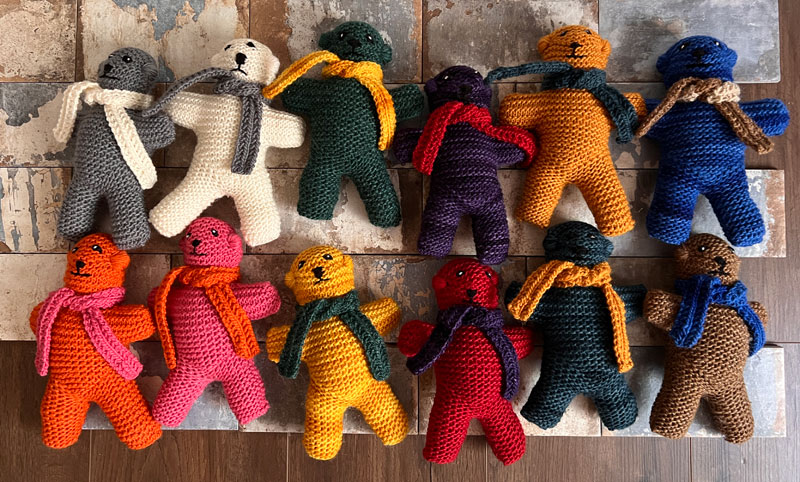
Here’s the free pattern for download. And here’s another look at my sleuth of bears all snug and cozy.

Spring knits..sublime to silly

So…spring! This is Dream in Color Designs’ Field of Violets. I knit mine in the yarn called for, a specially-dyed version of 100% merino Dream in Color Smooshy. Knitting this was a total hoot. The trick that produces the violets? Every time you get to the bright purple yarn you knit the special flower stitch that forms the violets.

Here’s what the yarn looks like skeined:

And here’s a closer look at my field of violets:

After a few false starts, I realized it would be helpful if I cast on as far away as possible from the purple contrasting color. The cast-on is only 4 stitches and increases only 1 stitch every 6 rows. Waiting to start a flower until several rows in gives a knitter room for the special stitch without distorting the structure of the start of the scarf.

I already spilled the beans about the trick to this design. You begin the flower stitch when your working yarn changes to the contrast color. At first, I misunderstood and thought you worked the flowers when you came to the contrast color stitches already on your needle. Nope. Watch for the purple coming up in your working yarn.

The flower stitch is worked over 3 rows. The pattern includes directions for how to work a flower when you encounter the contrast color on a right-side row and slightly different (but important) directions for when you encounter the contrast color while you’re working on a wrong-side row. The first 2 rows of the stitch are set out in the directions. The 3rd row is that you knit the stitches that have been bundled up. At first, I thought you put these bundled stitches back on the left hand needle at the end of the 2nd row manipulations and knit the bundle right away. Nope. Wrong again. Wait for the 3rd row. This video helped me understand what’s up with this flower stitch.

Another tip is that it’s perfectly OK to make different sized flowers. I fairly regularly encountered lengths of contrast color where I decided to work 6 stitches into the flower. Sometimes I knit teeny ones in only 3 stitches. And if you try to space the flowers in some way…well, best to give up at that. Flowers grow and scatter as they will. Let them do that in this scarf too, unless you want to drive yourself crazy.

Quite a few Ravelers report blocking their scarf. Not me. I like mine unblocked. More texture!

The instructions say that the midpoint of the scarf should be 38-40 inches from the cast-on and that you should increase to a set number of stitches before beginning the short “knit even” part of the scarf that forms the middle section. Despite my knitting on gauge with the yarn the pattern calls for, I didn’t get to 38 inches until I had 10 stitches more than the pattern called for. Other Ravelers reported that as well. I increased at the called-for interval until I got to 38 inches. Next I worked the straight section for the number of rows called for. And finally I began the decreases.

When I weighed my yarn at the midpoint I thought that it would be no problem to decrease, at the rate the pattern directs, all the way to the bind-off and not run out of yarn. But I was wrong. So for the last 6 inches or so of the pattern I decreased every 4 rows. That worked. My scarf is a somewhat different shape from what the designers planned. I’m fine with that!

I picked up this next skein at a yarn stall within an outdoor market. It was spun and dyed by southwest Michigan’s Shady Side Farm. I honestly don’t know what drew me to this particular skein. I’d not been even been overcome by Barbie fever.

I seem to recall that I thought it would make a nice accessory for my granddaughter. That pink has her name written all over it. But the yarn is definitely “rustic” in feel and my grand and rustic feel don’t really work. Eventually all I could see were piglets.

Piggies cavorting. I’ve called my Ravelry project Muddy Pigs Pigmania.

This beginner-friendly pattern is from Freya Jaffe’s wonderful classic book Toymaking with Children. I was introduced to the book when my son was in pre-school. His children are now well beyond their pre-school years and I’m still knitting simple toys from it. In the last 35 years I’ve made a million of these oinkers!

Stillness Shawl

I am over the moon about this shawl. It’s the Stillness Shawl by Australian knitwear designer Helen Stewart. If you’re thinking about the origin of “over the moon,” your instincts are correct. “..the cow jumped over the moon and the little dog laughed to see such fun” is its source. OK. You’re likely not thinking about the origin of the phrase just now. You’re likely and hopefully thinking about this wonderful shawl. It’s a 2020 pattern released by Stewart as part of a mystery knit-a-long.

Here’s how my Stillness Shawl started. My son and wonderfully attentive daughter-in-law gifted me these three skeins of fingering weight yarn during the December 2023 holidays. They live very near Rochester, New York, the home of Spun Right Round. Spun Right Round is an indie dyer that’s been at work since 2009. Their Classic Sock is 100% merino and 100% wonderful in my new lightweight shawl.

Here’s a closer look at the stitch patterns.

The colorways are The Big Teal Wave, Hoof It (the golden brown), and Sea Horse (the lightest colorway, with fleck of golden brown and yellow-orange). With the guidance of LOTS of stitchmarkers in the lace sections, this shawl turned out to be an easy knit. I confess to being a tad skittery at the start wondering if I’d be up to it because I’m not a particularly skillful lace knitter. But my concerns were completely misplaced.

Stewart’s patterns are always super clear. I’ve knit Miss May, Floating Shawl, and now my new Stillness. Each pattern is written in the same style. There are line-by-line instructions as well as charts for the lace. The line-by-line instructions inform the knitter as the stitch count changes. Yeah! That is an incredible aid to anyone who’s a bit lace-impaired or impaired as to a particular style of lace. And to keep a knitter on track as far as yarn usage, at regular intervals (5%…10%…) the pattern charts your progress. If you need to track your yarn usage this is super helpful. Plus it’s somehow encouraging to chart your road to completion so accurately.

My shawl, laid out here on a queen-sized bed, is 58 inches wide and 29 inches deep. I used 70 grams ( 307 yards) of the teal, 60 grams (263 yards) of the brown, and 56 grams (246 yards) of the lightest shade. I’m already planning for what to knit with the remaining yardage. Because this yarn is just too wonderful to sit long in my oddments bin.

Acorn Hill Ponies ( & Unicorns)

Pretty sweet, don’t you think? I’m especially proud of this knit because the pattern on Ravelry bears my name, with attribution to and permission from the original Waldorf school designer. Here’s the Rav freebie: Acorn Hill Pony. My lead version is knit in Blue Sky Fibers Extra, with a mane worked in colorful wool oddments from a Lorna Miser slipper kit.

This version is knit in purchased handspun. The gray was simply labeled Emily, which I figured was the sheep’s name. And the sweet pink/brown handspun is from Alpena Michigan’s Spruce Shadow farm.

The original Acorn Hill Pony is attributed to an unidentified knitter associated with the Acorn Hill school, a Waldorf kindergarten and nursery in Silver Spring, Maryland. In May of 2017 the school’s administrator, Janet Johnson, gave written permission for this pattern to be published to Ravelry, with my modifications and an extensive re-write of the original pattern to conform to the sensibilities of modern knitters.

In this next version the Spruce Shadow pink/brown colorway is the body. The Lorna’s Laces yarn again provides the mane and tale.

Here’s the herd. For the pink and the gray version I decided to experiment with safety eyes. That’s not “Waldorf-approved,” but they still worked out well.

At one point I had a lot of extra pink wool yarn from the Merino Sheepskin Company. Apparently my inner Barbie kicked in. Pink ponies tumbled off my needles.

Here’s a look at how this quartet took shape. As you see: easy peasy. All one piece.

The sewing-up takes very little time. I typically seam them looking at the right side, leaving a stuffing hole in the belly.

Here they are looking a little scary. I don’t usually use safety eyes mostly because that’s not a Waldorf thing.

When you look at the projects on Ravelry, you’ll see that it’s the stuffing that has tripped up a few folks. When my son was in Waldorf school I stuffed with unspun wool. That got pricey. For decades now I’ve stuffed my animals with polyfill. But–whatever stuffing you decide to use–you are going to need a lot of it. Experienced toy knitters know that. I think it trips up some of the newbies. There are quite a few Acorn ponies on Rav with front legs that don’t hold the weight of the pony’s head. Either that or some knitters planned on having a trick pony who is bowing to the audience. Bottom line. Stuff firmly. And shape the “gesture” of the horse you want before you sew up the belly.

A few Wolverines snuck in to this next herd.

These Brown Sheep Lamb’s Pride ponies were donated together for a local nonprofit gift shop. Here’s a look at the herd-in-process.

This next pony’s a recent version all in Lamb’s Pride Worsted. Purple Pony has pride-of-place in my Grand Rapids knitting room. I’ve knit half-a-million of these ponies over the last 35 years or so. They are so popular that Purple Pony is the only one that hasn’t yet been gifted or donated.

By now you may be weary of ponies. I got the idea to change my pony into a unicorn because some of the Ravelry knitters had done that. Cool! (Plus my granddaughter loves unicorns.)

It has been a joy to see the creatives among us play with this pattern. Ravelry’s knitters have saddled the pony. They’ve embroidered and appliqued his hide. They’ve knit a basketful of ponies. And they’ve even knit a herd of longhorn cows!

The Acorn Hill school’s generosity is greatly appreciated. They let me rescue and reinvigorate a wonderful critter pattern. And the school was grateful in turn because they’d lost the pattern over the years. I was able to restore the original pattern to them, along with my update.

Red stuff day

This is Faye Kennington’s fun “Off With Her Head” design. She writes that “The hearts and flouncy garden trellis motif of this hat have an ‘Alice in Wonderland’ quality to them.” Indeed they do. My Glass Head shudders to think of Iracebeth’s a/k/a the Queen of Hearts uttering her famous cruel phrase. Maybe it brings up old memories from the glass factory? Anyway, the hat does have an Alice in Wonderland look going.

And somehow this hat also conjures up a much less threatening Valentine’s Day vibe. I knit mine in Berroco Ultra Wool Worsted. The yarn is a sturdy superwool that’s skeined up in a huge variety of colorways including many solid shades.

The pattern is wonderfully clear. The fair isle chart didn’t even need magnifying to make it a comfy-on-the-eyeballs knit. It was almost completely clear of longer floats. That’s definitely a plus in fair isle work.

I followed the pattern precisely, including working the ribbing for 3.25 inches. If I knit it again I believe I’ll either shorten or lengthen the ribbing because the hat’s a tad awkward to wear. The ribbing is too short to fold over nicely. But with the ribbing unfolded the hat lengthens into more of a slouchy than I prefer. Still, an excellent pattern. And a fun knit!

The position of the hearts just before the crown decreases begin is a great look.

Next up, red socks.

These are Carol A. Anderson’s Iowa Crew/Cruise Socks. Mine are knit in a new-to-me yarn, Raggen by Viking of Norway. It’s another sturdy worsted in 70% wool 30% nylon. Steve’s pair has machine washed well–absolutely no felting.

Anderson’s been at the helm of Cottage Creations for a month of Sundays. Her booklets have been digitized and are now available on Ravelry. The pre-printed booklets are also still available through the Cottage Creations website and at many local yarn shops.

If you need a warm pair of boot socks or bed socks, this fits the bill. The pattern is written for all size feet. As with all Anderson’s patterns, she holds a knitter’s hands in a tight grip throughout the knit. The patterns are wordy and folksy. They make for a good read as well as a good knit.

Back to hats. This next one is Susan Villas Lewis’s Breck knit in sportweight Debbie Bliss Baby Cashmerino. This my fourth Breck. You’ll find the others here and here. I haven’t yet found a color combination that doesn’t work.

The simple slip stitch work has always been very effective for me. Go for the high contrast is my only advice. My sense is that it’s the mix of stockinette and garter that makes this hat stand out from the crowd. And the knit 2, purl 1 relaxed ribbing throughout the body is a great touch too.

The crown decreases are simple. But they work. It doesn’t bother me that the ribbing first changes to 1 by 1 and then to stockinette as the crown stitches draw closer together.

Breck is a seriously excellent pattern. Give it a try, especially since DK weight seems to be squeezing the sportweight yarns off the shelf. I’m finding sportweight somewhat over-represented in the sale shelfs of my local yarn shops.

Whether it’s Valentine’s or Galentine’s or Palentine’s …or even just another Wednes Day…have a great 14th!